Manuals/Neo FreeRunner/se
From Openmoko
(More editing (someone is maybe interested in providing the swedish word for "image")) |
Marko Knöbl (Talk | contribs) |
||
| (11 intermediate revisions by 6 users not shown) | |||
| Line 1: | Line 1: | ||
| − | {{Languages| | + | {{Languages|Manuals/Neo FreeRunner}} |
__NOTOC__ | __NOTOC__ | ||
__NOEDITSECTION__ | __NOEDITSECTION__ | ||
| Line 15: | Line 15: | ||
=Contents = | =Contents = | ||
| − | : [[Image:Circle2.gif|10px]] | + | : [[Image:Circle2.gif|10px]] Innehåll i lådan |
: [[Image:Circle2.gif|10px]] Lära känna Neo FreeRunner | : [[Image:Circle2.gif|10px]] Lära känna Neo FreeRunner | ||
| Line 26: | Line 26: | ||
| − | == | + | == Innehåll i lådan == |
{| class="wikitable" cellspacing="2" cellpadding="2" style="padding: 0%; margin:0em 0em 1em 0em; border:1px solid #ffffff; background:#ffffff; width:80%; floating="center"; " | {| class="wikitable" cellspacing="2" cellpadding="2" style="padding: 0%; margin:0em 0em 1em 0em; border:1px solid #ffffff; background:#ffffff; width:80%; floating="center"; " | ||
| Line 108: | Line 108: | ||
</td> | </td> | ||
<td style="width: 10px; white-space: nowrap; padding: 4px 1em 0 0.5em; border-right: 1px solid #ffffff;">[[Image:Menu7.jpg|200px|right|thumb]]</td><td style="padding: 1px 1em 0; background: #eeeeee;"> | <td style="width: 10px; white-space: nowrap; padding: 4px 1em 0 0.5em; border-right: 1px solid #ffffff;">[[Image:Menu7.jpg|200px|right|thumb]]</td><td style="padding: 1px 1em 0; background: #eeeeee;"> | ||
| − | + | Håll av/på-knappen nedtryckt och tryck och håll sedan AUX-knappen (ungefär 5-8 sekunder). Boot menyn för NAND flash dyker då upp. Tryck AUX för att välja rad i menyn och av/på för att utföra menyoptionen. | |
</td></tr></table> | </td></tr></table> | ||
</div> | </div> | ||
| − | ==== | + | ====Logga in i U-Boot i NOR-flash==== |
<div align-center> | <div align-center> | ||
| Line 121: | Line 121: | ||
<td style="width: 10px; white-space: nowrap; padding: 4px 1em 0 0.5em; border-right: 1px solid #ffffff;">[[Image:Menu6.jpg|200px|right|thumb]]</td><td style="padding: 1px 1em 0; background: #eeeeee;"> | <td style="width: 10px; white-space: nowrap; padding: 4px 1em 0 0.5em; border-right: 1px solid #ffffff;">[[Image:Menu6.jpg|200px|right|thumb]]</td><td style="padding: 1px 1em 0; background: #eeeeee;"> | ||
| − | + | Tryck och håll AUX-knappen, och tryck och håll därefter av/på-knappen. Släpp AUX-knappen. Du kan nu se bootmenyn för NOR-flash. (Dessa val används normalt för utvecklare. Om du inte kan logga in via NAND kan du komma åt U-boot via NOR-flashen) | |
</td></tr></table> | </td></tr></table> | ||
</div> | </div> | ||
| − | {{ | + | {{Note| Det finns sex val att välja mellan när du loggar in via NOR-flash |
| − | 1. | + | 1. Boota |
| − | 2. [[Boot from sd card| | + | 2. [[Boot from sd card|Boota från MicroSD]] |
| − | 3. | + | 3. Sätt konsollutmatning till USB |
| − | 4. | + | 4. Sätt konsollutmatning till seriell |
| − | 5. | + | 5. Återstart |
| − | 6. | + | 6. Stäng av |
}} | }} | ||
| − | == | + | ==Flasha Neo FreeRunner== |
| − | + | Allteftersom Openmokoutvecklingen fortgår släpps regelbundet uppdaterade versioner av rootfilsystemet, kärnan och [[Bootloader|bootladdaren U-boot]]. Dessa kan installeras i flashminnet hos Neo FreeRunner. Du kan använda USB-kabeln och Openmokoverktygen för att flasha Neo FreeRunner. | |
| − | {{note| | + | {{note|Openmokos mjukvaruteam bygger nya mjukvaruimagear dagligen. Om du vill använda den senaste imagen kan du ladda ned den från det dagliga bygget, men vi rekommenderar att du laddar ned den stabilaste imagen från http://downloads.openmoko.org/releases/. Dessa imagear har testats av testteamet.}} |
| − | === | + | ===Steg 1. Ladda ned DFU-util=== |
| − | + | Du kan ladda ned flashverktyget från: | |
| − | http://downloads.openmoko.org/releases/ | + | http://downloads.openmoko.org/releases/Om2008.9/dfu-util |
| − | + | På ett GNU/Linux-system kan du använda följande kommando för att ladda ned dfu-util: | |
| − | wget http://downloads.openmoko.org/releases/ | + | |
| + | wget http://downloads.openmoko.org/releases/Om2008.9/dfu-util | ||
| − | === | + | ===Steg 2. Flasha kärnan=== |
| − | + | Du kan ladda ned kärnan från | |
| − | http://downloads.openmoko.org/releases | + | http://downloads.openmoko.org/releases/ |
| − | + | Skriv in följande kommando i en terminal på din GNU/Linux-dator. | |
| − | ./dfu-util -a ( | + | ./dfu-util -a (partionsnamn) -R -D (nedladdad fil) |
| − | ex: | + | t.ex: |
./dfu-util -a kernel -R -D uImage-2.6.24+svnr4082-r4055-r3-neo1973.bin | ./dfu-util -a kernel -R -D uImage-2.6.24+svnr4082-r4055-r3-neo1973.bin | ||
| Line 169: | Line 170: | ||
! style="background:#ffffff;border-left:1px solid #ffffff;border-right:1px ; border-top:2px solid ffffff; border:1px solid #ffffff; width:75% " | | ! style="background:#ffffff;border-left:1px solid #ffffff;border-right:1px ; border-top:2px solid ffffff; border:1px solid #ffffff; width:75% " | | ||
<div align="left"> | <div align="left"> | ||
| − | [[Image:menu15.jpg|thumb| | + | [[Image:menu15.jpg|thumb|Logga in på Neo FreeRunner i NOR-flash, koppla upp din Neo med GNU/Linux-datorn via USB-kabel]] |
| − | + | Innan du utför kommandot, logga in på Neo FreeRunner i NOR-flashläge. Neo FreeRunner behöver boota in i U-boot när den flashas. | |
| − | + | Koppla därefter upp din Neo mot GNU/Linuxdatorn med USB-kabel. Tryck enter för at tutföra kommandot. När flashningen lyckas visas: | |
status(0) = No error condition is present<br> | status(0) = No error condition is present<br> | ||
| Line 179: | Line 180: | ||
|} | |} | ||
| − | {{note| | + | {{note| Parametrarna betyder: |
-a --alt alt Specify the altsetting of the DFU interface by name or by number<br> | -a --alt alt Specify the altsetting of the DFU interface by name or by number<br> | ||
-R --reset Issue USB Reset signalling once we're finished<br> | -R --reset Issue USB Reset signalling once we're finished<br> | ||
| Line 187: | Line 188: | ||
===Step 3. Flashing Root Filesystem === | ===Step 3. Flashing Root Filesystem === | ||
You can download the root filesystem from : | You can download the root filesystem from : | ||
| − | http://downloads.openmoko.org/releases/ | + | http://downloads.openmoko.org/releases/Om2008.9/ |
Type in the following command in the terminal of a GNU/Linux host. | Type in the following command in the terminal of a GNU/Linux host. | ||
| Line 246: | Line 247: | ||
* [[FreeRunner/Buttons and LEDs]] | * [[FreeRunner/Buttons and LEDs]] | ||
| − | [[Category:Hardware | + | [[Category:Neo FreeRunner Hardware/se]] |
| − | + | ||
Latest revision as of 11:28, 12 January 2010
| Languages: |
English • العربية • Български • Česky • Dansk • Deutsch • Esperanto • Eesti • Español • فارسی • Suomi • Français • עברית • Magyar • Italiano • 한국어 • Nederlands • Norsk (bokmål) • Polski • Português • Română • Русский • Svenska • Slovenčina • Українська • 中文(中国大陆) • 中文(台灣) • Euskara • Català |
|
Tack för att du köpt denna utvecklarversion av Neo FreeRunner. Neo FreeRunner-telefonen är den andra hårdvaruplattformen som baseras på Openmoko. Denna handledning hjälper dig att lära känna din Neo FreeRunner och att komma igång med den. |
|---|
Contents
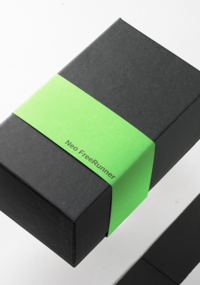
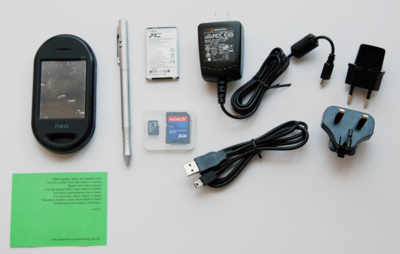
Innehåll i lådan
Lära känna Neo FreeRunner
Starta Neo FreeRunner
Du kan starta din Neo FreeRunner på följande sätt:
-
 Starta U-Boot via NAND-flash.
Dessa metoder tillåter dig att uppdatera kärnan och rootfilsystemet.
Logga in på Openmoko-imagen
|
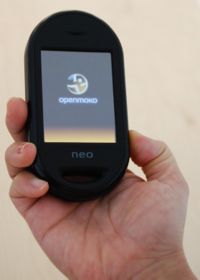
Håll av/på-knappen nedtryckt (ungefär 8 sekunder) tills Openmokos uppstartsbild dyker upp. Du kan nu släppa av/på-knappen och Neo FreeRunner kommer att fortsätta att starta Openmoko-imagen. |
Logga in i U-Boot i NAND Flash
|
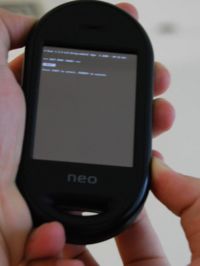
Håll av/på-knappen nedtryckt och tryck och håll sedan AUX-knappen (ungefär 5-8 sekunder). Boot menyn för NAND flash dyker då upp. Tryck AUX för att välja rad i menyn och av/på för att utföra menyoptionen. |
Logga in i U-Boot i NOR-flash
|
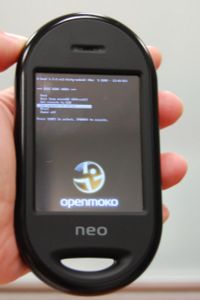
Tryck och håll AUX-knappen, och tryck och håll därefter av/på-knappen. Släpp AUX-knappen. Du kan nu se bootmenyn för NOR-flash. (Dessa val används normalt för utvecklare. Om du inte kan logga in via NAND kan du komma åt U-boot via NOR-flashen) |
| NOTE: Det finns sex val att välja mellan när du loggar in via NOR-flash
1. Boota 3. Sätt konsollutmatning till USB 4. Sätt konsollutmatning till seriell 5. Återstart 6. Stäng av
|
Flasha Neo FreeRunner
Allteftersom Openmokoutvecklingen fortgår släpps regelbundet uppdaterade versioner av rootfilsystemet, kärnan och bootladdaren U-boot. Dessa kan installeras i flashminnet hos Neo FreeRunner. Du kan använda USB-kabeln och Openmokoverktygen för att flasha Neo FreeRunner.
| NOTE: Openmokos mjukvaruteam bygger nya mjukvaruimagear dagligen. Om du vill använda den senaste imagen kan du ladda ned den från det dagliga bygget, men vi rekommenderar att du laddar ned den stabilaste imagen från http://downloads.openmoko.org/releases/. Dessa imagear har testats av testteamet. |
Steg 1. Ladda ned DFU-util
Du kan ladda ned flashverktyget från: http://downloads.openmoko.org/releases/Om2008.9/dfu-util
På ett GNU/Linux-system kan du använda följande kommando för att ladda ned dfu-util:
wget http://downloads.openmoko.org/releases/Om2008.9/dfu-util
Steg 2. Flasha kärnan
Du kan ladda ned kärnan från http://downloads.openmoko.org/releases/
Skriv in följande kommando i en terminal på din GNU/Linux-dator.
./dfu-util -a (partionsnamn) -R -D (nedladdad fil)
t.ex:
./dfu-util -a kernel -R -D uImage-2.6.24+svnr4082-r4055-r3-neo1973.bin
|
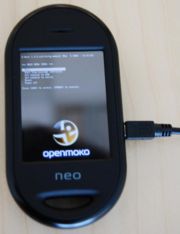
Innan du utför kommandot, logga in på Neo FreeRunner i NOR-flashläge. Neo FreeRunner behöver boota in i U-boot när den flashas. Koppla därefter upp din Neo mot GNU/Linuxdatorn med USB-kabel. Tryck enter för at tutföra kommandot. När flashningen lyckas visas: status(0) = No error condition is present |
|---|
| NOTE: Parametrarna betyder:
-a --alt alt Specify the altsetting of the DFU interface by name or by number |
Step 3. Flashing Root Filesystem
You can download the root filesystem from : http://downloads.openmoko.org/releases/Om2008.9/
Type in the following command in the terminal of a GNU/Linux host.
./dfu-util -a rootfs -R -D openmoko-devel-image-fic-gta02.jffs2
When flashing succeeds
status(0) = No error condition is present
Done!
Connect To Neo FreeRunner By USB Networking
Connect Neo FreeRunner to Linux host with USB cable. For OS X please refer to MacOS_X. After booting into Openmoko image, there will be a new interface, usb0, in your Linux host.
Manual Method
Type in the following command in the terminal of a GNU/Linux host.
ifconfig usb0 192.168.0.200 netmask 255.255.255.0
ssh root@192.168.0.202
Press Enter to pass the password.
Automatic Method
- Debian and derivatives (Ubuntu, Sidux etc.)
Edit /etc/network/interfaces
auto usb0
iface usb0 inet static
address 192.168.0.200
netmask 255.255.255.0
- Gentoo
Edit /etc/conf.d/net
config_usb0="192.168.0.200/24"
Restart the networking service and type in the following command in the terminal of GNU/Linux host.
ssh root@192.168.0.202
Press Enter to pass the password.
Making things even more automatic
If you don't want to remember the IP number of your phone you can create an alias by adding the following line to your /etc/hosts:
192.168.0.202 openmoko
Now it should immediately be possible to connect your phone using the following command line:
ssh root@openmoko
Appendex
If you want to know more about FreeRunner, you can get more information in following topics:

