Manuals/Neo FreeRunner/zh tw
From Openmoko
| Line 3: | Line 3: | ||
__NOEDITSECTION__ | __NOEDITSECTION__ | ||
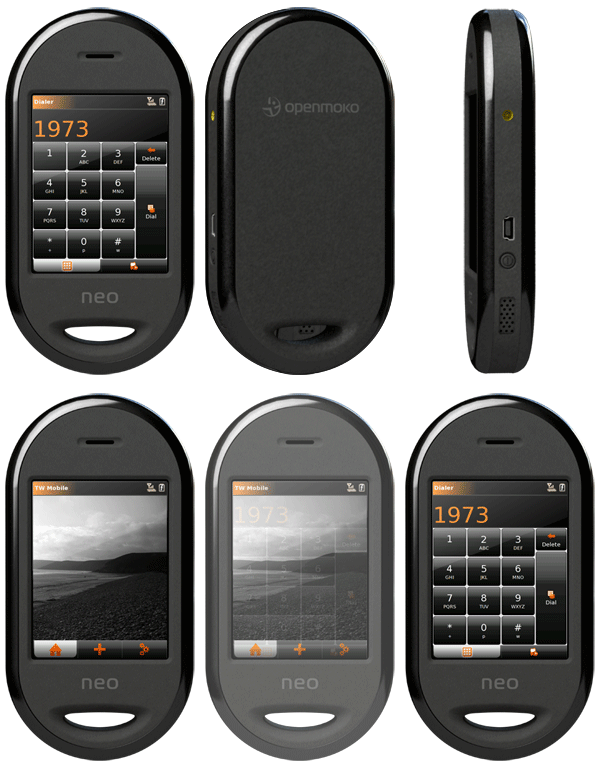
[[Image:GTA02.gif |right|frontside]] | [[Image:GTA02.gif |right|frontside]] | ||
| + | |||
| + | |||
| + | |||
| + | |||
感謝您購買開發人員版的Neo FreeRunner! | 感謝您購買開發人員版的Neo FreeRunner! | ||
| Line 11: | Line 15: | ||
== 大綱 == | == 大綱 == | ||
| − | + | : [[Image:Circle2.gif|10px]] 產品包裝內容物 | |
| − | + | : [[Image:Circle2.gif|10px]] 暸解Neo FreeRunner | |
| − | + | : [[Image:Circle2.gif|10px]] 啟動Neo FreeRunner | |
| − | + | : [[Image:Circle2.gif|10px]] 更新Neo FreeRunner | |
| − | + | : [[Image:Circle2.gif|10px]] 透過USB 連接到Neo FreeRunner | |
==產品包裝內容物== | ==產品包裝內容物== | ||
| + | {| class="wikitable" cellspacing="2" cellpadding="2" style="padding: 0%; margin:0em 0em 1em 0em; border:1px solid #ffffff; background:#ffffff; width:80%; floating="center"; " | ||
| + | ! style="background:#ffffff;border-left:1px solid #ffffff;border-right:1px ; border-top:2px solid ffffff; border:1px solid #ffffff; " | | ||
| + | <div align="left"> | ||
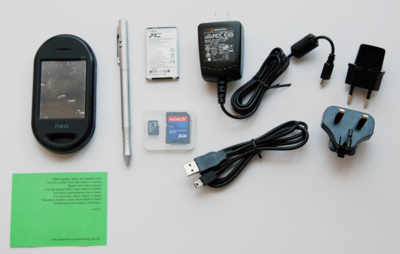
| + | [[Image:GTA02ALL.png|400px|thumb|Inside package]] | ||
| + | | | ||
| + | |||
*Neo FreeRunner 手機 | *Neo FreeRunner 手機 | ||
*雷射觸控筆 | *雷射觸控筆 | ||
| Line 25: | Line 35: | ||
*microSD Card 512MB | *microSD Card 512MB | ||
| + | |} | ||
| + | </div> | ||
==暸解Neo FreeRunner== | ==暸解Neo FreeRunner== | ||
===啟動Neo FreeRunner=== | ===啟動Neo FreeRunner=== | ||
Revision as of 05:32, 16 June 2008
| Languages: |
English • العربية • Български • Česky • Dansk • Deutsch • Esperanto • Eesti • Español • فارسی • Suomi • Français • עברית • Magyar • Italiano • 한국어 • Nederlands • Norsk (bokmål) • Polski • Português • Română • Русский • Svenska • Slovenčina • Українська • 中文(中国大陆) • 中文(台灣) • Euskara • Català |
感謝您購買開發人員版的Neo FreeRunner! 本手冊將有助於使用者暸解Neo FreeRunner的內容及如何使用它:
- 更新root filesystem
- 更新kernel
- 設定開發環境並且編譯一個簡單樣本應用程式。
大綱
產品包裝內容物
|
暸解Neo FreeRunner
啟動Neo FreeRunner
有三種方法可以啟動Neo FreeRunner。 你可以自NAND 記憶體或NOR 記憶體啟動Openmoko 映像檔。或者,你也可以自U-Boot中啟動Neo FreeRunner ,利用這個方法,可以讓你更新kernel、root filesystem。
自NAND Flash中啟動Openmoko映像檔
按下電源按鈕直到Openmoko 開機畫面出現,即可放開電源按鈕。 Neo FreeRunner將會開始進入啟動 Openmoko 映像檔。
自NOR Flash中啟動Openmoko映像檔
同時按下電源按鈕及Aux按鈕。
啟動電源,進入U-Boot
你可以自以下的網址下載連接工具: http://svn.openmoko.org/developers/werner/neocon
使用USB接線分別連接Neo FreeRunner及Linux主機。在主機輸入以下指令:
./neocon /dev/ttyACM0
按下ENTER鍵
[Closed]
啟動Neo FreeRunner 並在LINUX主機上按下Enter鍵,螢幕上會出現下列訊息:
[Open]
In: usbtty
Out: usbtty
Err: usbtty
switching led 0 1
DEVICE_CONFIGURED: 1
Hit any key to stop autoboot: 0
請按下任何鍵,停止自動啟動功能,並且進入U-Boot:
GTA02v5#
更新Neo FreeRunner
隨著Openmoko不斷發展,Openmoko會不定時的上傳Openmoko root filesystem的版本、kernel及U-Boot。這些可以被寫入Neo FreeRunner的記憶體當中。你可以使用USB接線及Openmoko所提供的工具來更新Neo FreeRunner。
Neo FreeRunner需要在更新時進入U-Boot:
你可以在下面的位置下載更新工具: http://buildhost.openmoko.org/daily/neo1973/deploy/glibc/images/neo1973/dfu-util
更新Kernel
你可以自下面的位置更新最近的kernel: http://buildhost.openmoko.org/daily/neo1973/deploy/glibc/images/neo1973/
在Linux 主機上鍵入以下的指令:
./dfu-util -a kernel -R -D uImage-2.6.24+svnr4082-r4055-r3-neo1973.bin
當更新完成時,會出現下列訊息:
status(0) = No error condition is present Done!
更新Root Filesystem
你可以自下面的位址更新最近的root filesystem: http://buildhost.openmoko.org/daily/neo1973/deploy/glibc/images/neo1973/
在Linux 主機上鍵入以下的指令內容:
./dfu-util -a rootfs -R -D openmoko-devel-image-fic-gta02.jffs2
在更新完成時會出現下面的訊息:
status(0) = No error condition is present Done!
由USB 連接到Neo FreeRunner
使用USB接線連接Neo FreeRunner 與Linux主機,在啟動Openmoko 映像檔之後,在你的Linux Host端將會出現一個新的界面。
手動控制
在Linux 主機上輸入以下的指令:
ifconfig usb0 192.168.0.200 netmask 255.255.255.0
ssh root@192.168.0.202
按下Enter鍵並且輸入您的密碼。
自動更新法
使用 Ubuntu 編輯/etc/network/interfaces
auto usb0
iface usb0 inet static
address 192.168.0.200
netmask 255.255.255.0
重新啟動網路服務,並且在Linux主機中輸入以下的指令:
ssh root@192.168.0.202
按下 Enter ,並輸入密碼。


